A simple car care technique that does not require any technical knowledge could save you a lot of money in the long run. Washing your car weekly or monthly all depends on the amount of use and dirt in your environment, what does matter is the use of the right products and techniques. Not following the basic car care techniques below will cause swirl marks and in some cases further paint damage in the long run.
It is important to retain this knowledge, whether if you wash your own car or someone on your behalf as bad car wash habits are too common. In fact avoid the local car wash or dealership, in most cases the materials used are not as good and the rush to finish technique is not recommended and in many cases can do more harm than good.
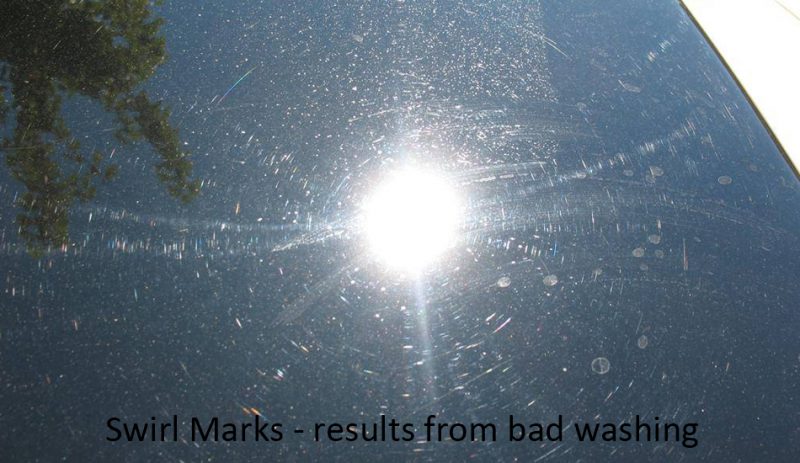
While there are many causes of swirls, the biggest culprit is improper washing and drying techniques. To put this in perspective if your car has swirl marks, you would need the service of a car detailer to correct your paint work which might rank upto 15 hours of machine polishing to bring the swirl free shine back on the bodywork.
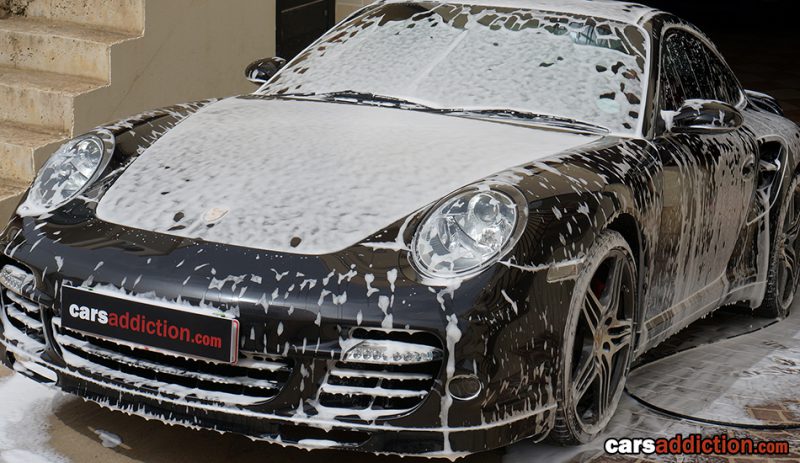
We recently had the opportunity to experience a 2004 Porsche 911 Turbo that needed a light car wash, nothing fancy just simple shampoo and dry. The car is already free of any swirl marks and we wanted to make sure it was kept that way. Continue reading the article that covers the two main objectives to a basic car wash - Products and techniques.
Shopping List
Below are the items that every car enthusiasts must stock on for proper care for their car. Go through the items, and see what you have missing and add it to your online shopping cart or Christmas wishlist!
- Leather solution
-
- Leather should always be kept moist and maintained in order for it to keep flexible and soft. Without the proper product or none at all will result in leather seats cracking.
[EU Alternative]
- Soft Bristle Brushes
- Used to agitate the leather cleaner into the seats, another to remove the dust from the vents and tight corners of the interior. Paint brushes will do.
[EU Alternative]
- Microfiber Cleaning Cloths
- With every step, you will be changing between cloths, and by time they come dirty, so might as well get large packs.
[EU Alternative]
- Snow Foam
- An important and crucial step to the basic wash. Our first contact with a dirty car is a contactless one, in order to minimize the chance of us rubbing dirt into the paintwork and thus avoid swirl marks.
[EU Alternative]
- Snow Foam Lance
- This would need to be purchased separately, from your pressure washer. Make sure it comes with a connection to fit your current setup.
[EU Alternative]
- Pressure washer
- Faster and more effective than the pipe method. And would be needed to apply the snow foam and clean the road grime underneath the arches. Whichever one you buy, make sure it has a metal pump and warranty. If doing this commercially a Kranzle is recommended to cope with the load.
[EU Alternative]
- Wheel Cleaner
- The wheels are the direct contact to the road and thus can get really dirty, in addition to the brake dust build up. What we recommended will protect and maintain the face and finish of your wheel, and in addition will be safe to apply over the caliper and discs.
[EU Alternative]
- Clean water
- Never assume with any clients that they are using clean water free from contaminants. If you live in an area where water distribution is questionable, install reverse osmosis for peace of mind.
[EU Alternative]
- Wash bucket with grid x 2
- To be used in conjunction with the sponge (dry mitt) and a separate one with the drying towel. The grid is an important element to trap and separate the loose dirt to the bottom of the bucket. Grit Guards are placed at the bottom of both the wash and rinse buckets.
[EU Alternative]
- Microfiber Wash Mitt (Sponge)
- I hope you all do make sure you have the right sponge. Getting a traditional sponge will trap dirt within the sponge itself causing you to rub the dirt in the paintwork and thus cause swirl marks.
[EU Alternative]
- Shampoo
- This is to be used together with the sponge after the snowfoam step to act as a lubricant.
[EU Alternative]
- Drying towel with Waffle Weave
- Ideally, you would need something so absorbent that one pass will be enough to absorb all the water. Don't forget multiple passes to dry the surface, equals a greater chance of swirl marks.
[EU Alternative]
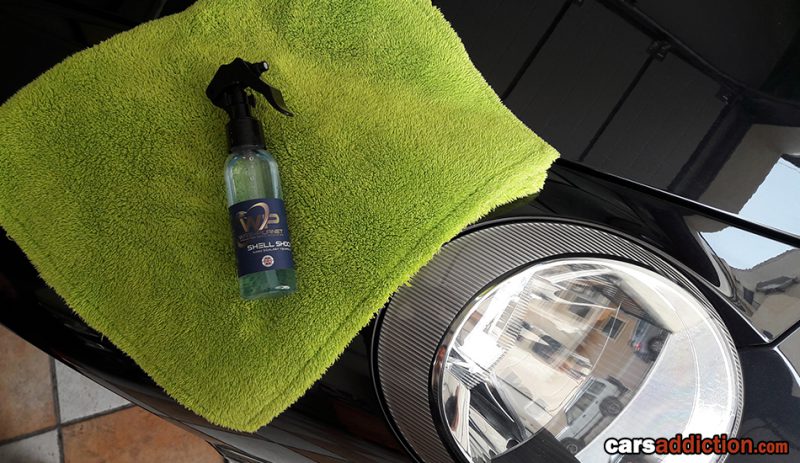
- Spray Wax Sealer
- Not really needed with a basic wash, but it never hurts to apply an additional layer of protection to your newly clean surface.
[EU Alternative]
Note: Product availability differs between markets, although the main target is for our American readers, we also recommend alternative products for our European visitors.
Steps for a proper basic car wash
The car care steps mentioned below are to ensure you maintain your new or recently detailed car with the same finish it left the showroom floor. It is important that every component should have its own dedicated drying cloth, that one for leather, a separate for the body panels, other for wheels, another for the wax and so on.
- Interior - Vacuum & Dusting
- If the interior needs vacuuming and cleaning, please carry this before starting the exterior.
- Interior - Leather treatment
- Religiously maintaining your leather surfaces with a cleaner and conditioner will mean the difference between soft leather seats or harsh and prone for cracks seats.
- Other various products are also necessary depending on the available surfaces in your car such as Plastic, Leather, Cloth ...etc.
- Snow Foam
- The first interaction whilst washing the exterior of your dirty car should be a contactless one. The reason being we would want to move the maximum amount of dirt we can before doing any type of contact with the surface.
- Don't worry if all the dirt does not fall off. You can always attempt another pass of snow foam to soften those stubborn dirt patches, meaning less effort required at a later stage.
- A useful pattern would be to start at the roof and work your way down.
- Wheel cleaner
- Important to use a non acid-base wheel cleaner. The cleaner is in close contact with your brakes and using an acid-free product will allow us to freely spray on the wheel surface without worrying much on this component.
- While in the area you can use the same product for under the arches.
- Use a brush dedicated just for the wheels to get inside the tight areas and to reach the inner barrels of the wheels.
- Rinse with clean water
- Make sure your pressure washer is set to a wide spray setting instead of a jet stream of water.
- Shampoo and Sponge
- Using a bucket with a grit guard and an appropriate sponge, aka wash mitt.
- Mix the right water to shampoo ratio into the bucket.
- Apply the shampoo on the car's bodywork in abundance using the wash mitt.
- No need to apply any pressure but make sure you 'massage ' all parts of the body to release any stubborn dirt that hasn't been removed by the snow foam.
- After washing each small section, dip the dirty mitt into the bucket and brush it against the grit guard at the bottom of the bucket. This will help to dislodge the dirt and debris from the mitt and keep it at the bottom of the bucket.
- Rinse with clean water
- Make sure your pressure washer is set to a wide spray setting instead of a jet stream of water.
- Important to do this immediately and not allow soap to dry on the surface.
- Drying towel
- Use a separate bucket with grit guard to rinse your towel between sections.
- Avoid using chamois or regular cloths, these do not have the properties to pick any loose dirt away from the body which in result might scratch your paint if used.
- Microfiber drying towels are the key to drying your car quickly, without leaving any streaks and absorbing the dirt away from contact between the body and the first layer of the towel.
- Some microfiber towels might induce swirls in your paint, which is why you must follow our above recommendation towards the right kind of microfiber, and care for it properly as well between washes.
- Drive the car around the block
- The reason for this is so that hidden water within the gaps bleed out for you to easily wipe off.
- An alternative to this would be to use an air compressor with an air gun to blow off all of the standing water, and water that hides in all of the cracks and crevices.
- Wipe excess water
- You can use general purpose towels for cleaning areas like the door jambs, behind the fuel filler lid, and drying the wheels. Never mix your drying towel general purpose ones.
- Quick Detailer or Spray Wax.
- Buff to a streak-free finish
- Make sure that the surface of the vehicle is cool to the touch, and preferably in the shade for optimum results.
All Finished!
Thank you for following our simple car wash protocol and hope you have learned to prevent any further swirl marks to your car. Please take the time to view a sample video highlighting the steps above and while you are at it please share and subscribe to our channel if you find the content useful.
The above steps will come second nature after several washes and the whole process of washing and drying would take you about an hour.
Use code carsaddiction for 20% off!