This is a quick and easy way on how to show off your carded Hot Wheels in your garage or bedroom so that you can enjoy your collection any time. The guide uses basic tools and materials that you might already have. The emphasize of this stand is to avoid nailing a hole into your wall for every card, and to have the mount somewhat mobile if you ever need to move it to another place.
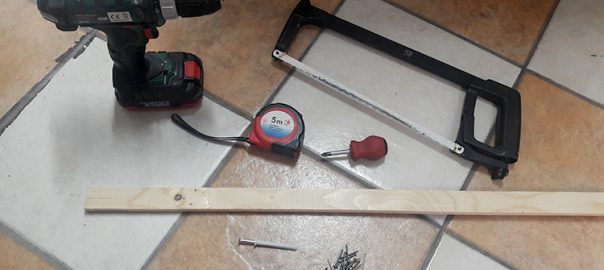
Tools Needed
- Drill
- Philips Screwdriver
- Measuring Tape / Ruler
- Hammer
Materials Needed
- 2cm (1 inch) nails
- 5cm Wall Screw with Sleeve
- Quantity: 1 per column needed
- 3cm wide, 1cm deep Wooden strip (length suitable for your applciation)
- In our example we are using 1m length, but teh layout can withstand more length since hot wheels are light themselves.
Steps
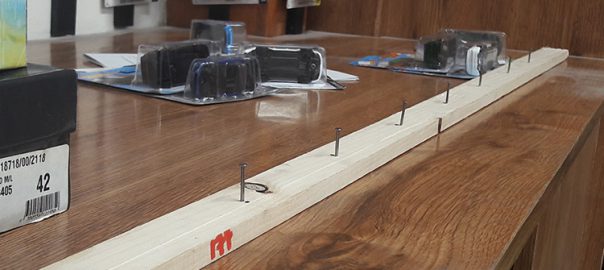
- Cut the wood strip to the desired length
- Start from one side of the wood and mark the mounting point 2cm from the edge
- From the mounting point mark every 11cm from thereafter until you get to the other end.
- Hammer the nails into all teh marked points accept for mounting point in Step 2.
- [Optional] Give it a coat of paint
- Drill a hole accordingly into the wall for the Top mount and place the sleeve into the wall.
- Screw the top mount screw into the wood, straight into the sleeve into the wall but do not tighten it all the way.
- Hang your Hot Wheel cards onto your new mount and enjoy!
Hope you found this article useful, and if you did please share around within your circles. In the meantime checkout the video we took of us building the hot wheel stand described above.
Use code carsaddiction for 20% off!